Quickstart
Follow these steps to install the Tezos SDK for Unity in an existing Unity project and start using it.
These instructions cover:
- Installing the SDK into an existing Unity project
- Testing that the SDK works in your project
- Adding objects that connect to a user's Tezos wallet
Connecting to a user's wallet is a prerequisite to working with Tezos in any application. Accessing the wallet allows your project to see the tokens in it and to prompt the user to submit transactions, but it does not give your project direct control over the wallet. Users must still confirm all transactions in their wallet application.
Using a wallet application in this way saves you from having to implement payment processing and security in your application. Game developers can also use the wallet and its account as a unique account identifier and as the user's inventory.
-
Make sure that you have Unity Editor version 2021.3.23f1 or later.
-
Install a Tezos-compatible wallet on a mobile device that has a camera and can scan QR codes.
-
Switch the wallet to Ghostnet and use the Ghostnet faucet to get some tez that you can use to send transactions to your Unity projects.
-
Install the SDK through the Unity asset store:
- In the Unity asset store, find the Tezos SDK for Unity.
- Click Add to My Assets.
- In the Unity Editor, in the Package Manager panel, find the Tezos SDK for Unity and click the Download button.
- TODO double-check these instructions when the new package is available on the asset store.
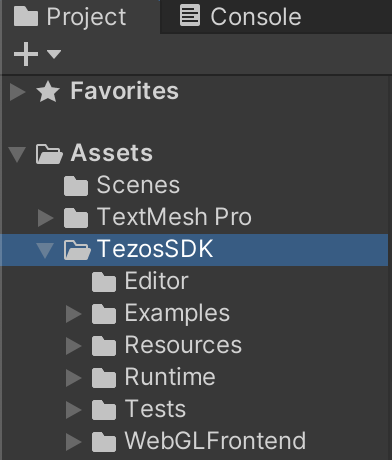
- Verify that the SDK is installed by opening the Project panel and expanding the Assets > TezosSDK folder.
If you see the TezosSDK folder with sub-folders including Editor, Examples, Resources, and Runtime, the SDK is installed correctly, as in this picture:

-
Verify that the SDK works in your project by running the WalletConnection example scene, which demonstrates how to connect to a Tezos wallet in a Unity project:
-
In the Project panel, expand Assets > TezosSDK > Examples > WalletConnection and open the
_WalletConnectionscene. -
Run the scene, which shows a QR code.
-
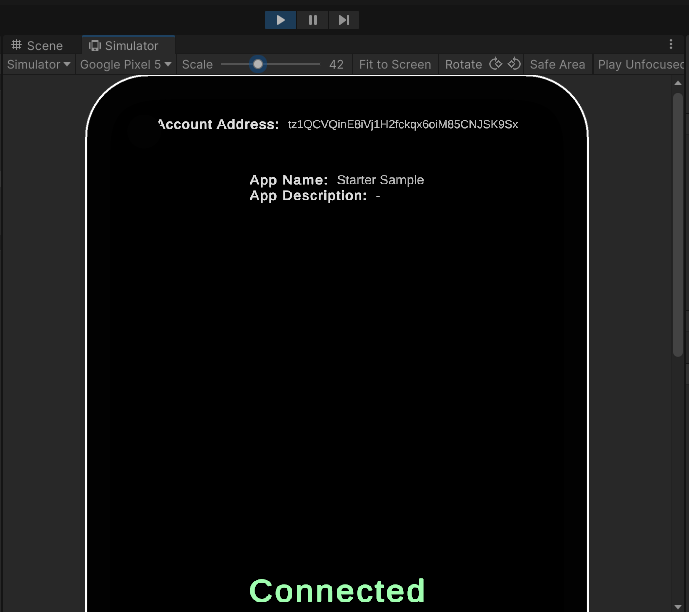
Use your wallet app to scan the barcode and confirm the connection to the Unity project. The project UI shows the address of the connected account, as in this picture:

-
-
Copy the
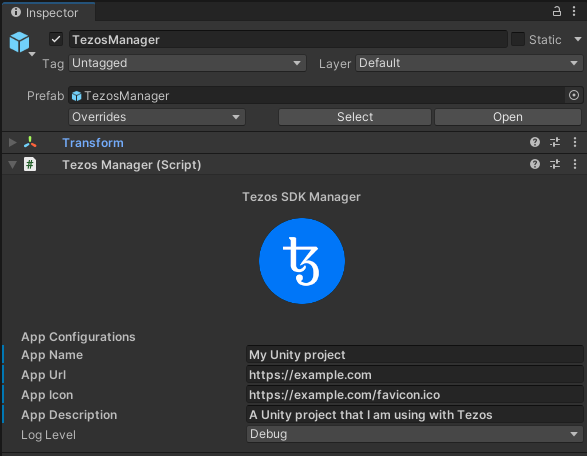
MainThreadExecutorandTezosManagerprefabs to your scene. These prefabs provide prerequisites to use Tezos in a scene. TheTezosManagerfields control what users see in their wallet applications before connecting to the project, as shown in this picture of the Inspector panel:
-
Add features to your project that connect to users' wallets. You can copy objects from the
_WalletConnectionscene, including the QRCode, LogoutButton, and AccountAddress objects.The
TezosSDK/Examples/WalletConnection/Scripts/QRImageGenerator.csfile receives a handshake from theTezosManagerobject and uses the handshake information to generate a URI and encode that URI to a QR code image:private void SetQrCode(HandshakeData handshake_data)
{
if (encoded)
{
return;
}
var uri = "tezos://?type=tzip10&data=" + handshake_data.PairingData;
EncodeTextToQrCode(uri);
}You can adjust this code and the bound Unity object to control when and where the QR code appears.
-
Add features to your project to use the connected account. For example, the
TezosSDK/Examples/Common/Scripts/AccountInfoUI.csfile responds to theAccountConnectedevent, which runs when the user scans the QR code and approves the connection in their wallet app. When the event runs, it uses theTezosManager.Instance.Walletobject to get information about the connected account, such as its address:private void Start()
{
addressText.text = notConnectedText;
TezosManager.Instance.MessageReceiver.AccountConnected += OnAccountConnected;
TezosManager.Instance.MessageReceiver.AccountDisconnected += OnAccountDisconnected;
}
private void OnAccountDisconnected(AccountInfo account_info)
{
addressText.text = notConnectedText;
}
private void OnAccountConnected(AccountInfo account_info)
{
addressText.text = TezosManager.Instance.Wallet.GetActiveAddress();
// OR
addressText.text = account_info.Address;
}You can use this address as a user's account ID, because Tezos account addresses are unique.
-
You can get the tokens that the connected account owns by calling the
TezosManager.Instance.Tezos.API.GetTokensForOwnermethod in a coroutine: This example prints information about the tokens that the account owns to the log:using Beacon.Sdk.Beacon;
using TezosSDK.Beacon;
using TezosSDK.Tezos;
using TezosSDK.Helpers;
using TezosSDK.Tezos.API.Models.Tokens;
using TezosSDK.Tezos.API.Models.Filters;
// ...
void Start()
{
TezosManager.Instance.MessageReceiver.AccountConnected += OnAccountConnected;
}
private void OnAccountConnected(AccountInfo account_info)
{
var address = TezosManager.Instance.Wallet.GetActiveAddress();
var routine = TezosManager.Instance.Tezos.API.GetTokensForOwner(
callback: onTokenBalances,
owner: address,
withMetadata: true,
maxItems: 10_000,
orderBy: new TokensForOwnerOrder.ByLastTimeAsc(0)
);
StartCoroutine(routine);
}
private void onTokenBalances(IEnumerable<TokenBalance> tokenBalances)
{
var address = TezosManager.Instance.Wallet.GetActiveAddress();
List<TokenBalance> tokens = new List<TokenBalance>(tokenBalances);
if (tokens.Count > 0)
{
foreach (var tb in tokens)
{
Debug.Log(
$"{address} has {tb.Balance} tokens on contract {tb.TokenContract.Address}");
Debug.Log(tb.TokenMetadata);
}
}
else
{
Debug.Log($"{address} has no tokens");
}
} -
You can send transactions to the user's wallet:
TODO
For more examples of how to work with the SDK, see the scenes in the TezosSDK/Examples folder.
Note that if you stop the project while your wallet is connected and restart the project later, it remembers that your wallet is connected. The SDK uses the Beacon SDK to connect to wallets and remember connections.